For some time GPG has supported storing the private keys you use to sign and decrypt e-mails and log in to servers over SSH on a secure smartcard or USB token. This protects them from being copied even if your SSH client has a really nasty bug but unfortunately, the tokens and cards are expensive, opaque proprietary things.
There’s one exception: Niibe Yutaka of the Free Software Initiative of Japan created an open source firmware called Gnuk that’s runs on a widely-available ARM microcontroller and is mostly compatible with the official OpenPGP card. You can even run it on cheap $4 Maple Mini clones that are widely available on sites like AliExpress. Of course you should bear in mind the warning about homebrew crypto in my previous post, though Gnuk seems far better designed and written than that code.
It’s pretty easy to make your own too, so long as you’re using Linux. All you need is the Maple Mini, a USB-to-serial board that supports even parity (if you’re using a CH340-based one on Linux, you’ll need this kernel patch), git, and a working version of GCC for embedded ARM. Grab Gnuk and build it:
git clone git://git.gniibe.org/gnuk/gnuk.git

cd gnuk/src

git submodule init

git submodule update

./configure --vidpid=234b:0000 --target=MAPLE_MINI

make -j3
You should get a gnuk.bin, gnuk.elf and gnuk.hex containing the newly-compiled version of Gnuk in various formats. Now let’s flash it using stm32flash. Connect GND on your USB-to-serial adapter to GND and boot1 (pin 2) on your Maple Mini, TXD to TXD, RXD to RXD, and 3.3V to VCC and boot0 (may be labelled “but” or 32). Now plug in the USB-to-serial adapter and run this command:
stm32flash -w build/gnuk.bin -v /dev/ttyUSB0
This is sufficient for testing purposes, but once you’re sure it’s working and before putting any important keys on your new token you also need to read-protect the chip so that someone else can’t use the programming interface to read your keys out. The command to enable read protection is:
stm32flash -j /dev/ttyUSB0
Also note that your Maple Mini will no longer work with the Maple IDE after you’ve installed Gnuk. You can remove read protection, erase Gnuk along with any keys and restore it to its original state by downloading a copy of the Maple Mini bootloader and running:
stm32flash -k /dev/ttyUSB0

stm32flash -w maple_mini_boot.bin -v /dev/ttyUSB0
Anyway, now you should be able to plug your Maple Mini in via USB and it’ll show up as a Gnuk token that you can set up by following the official documentation. Bear in mind that Gnuk 1.1.x has a couple of new quirks that aren’t mentioned in that documentation: you can’t change either PIN unless you’ve added at least one key, and if you set the user PIN without setting an admin PIN it should disable the admin PIN entirely, though you might want to check this.
Now, for reasons of practicality I’m not actually using a Maple Mini anymore (also, I accidentally ripped the USB connector off mine while trying to remove it from a breadboard). Instead, I’ve switched to a custom hardware design that fits inside the case of a cheap, no-brand USB drive from China:
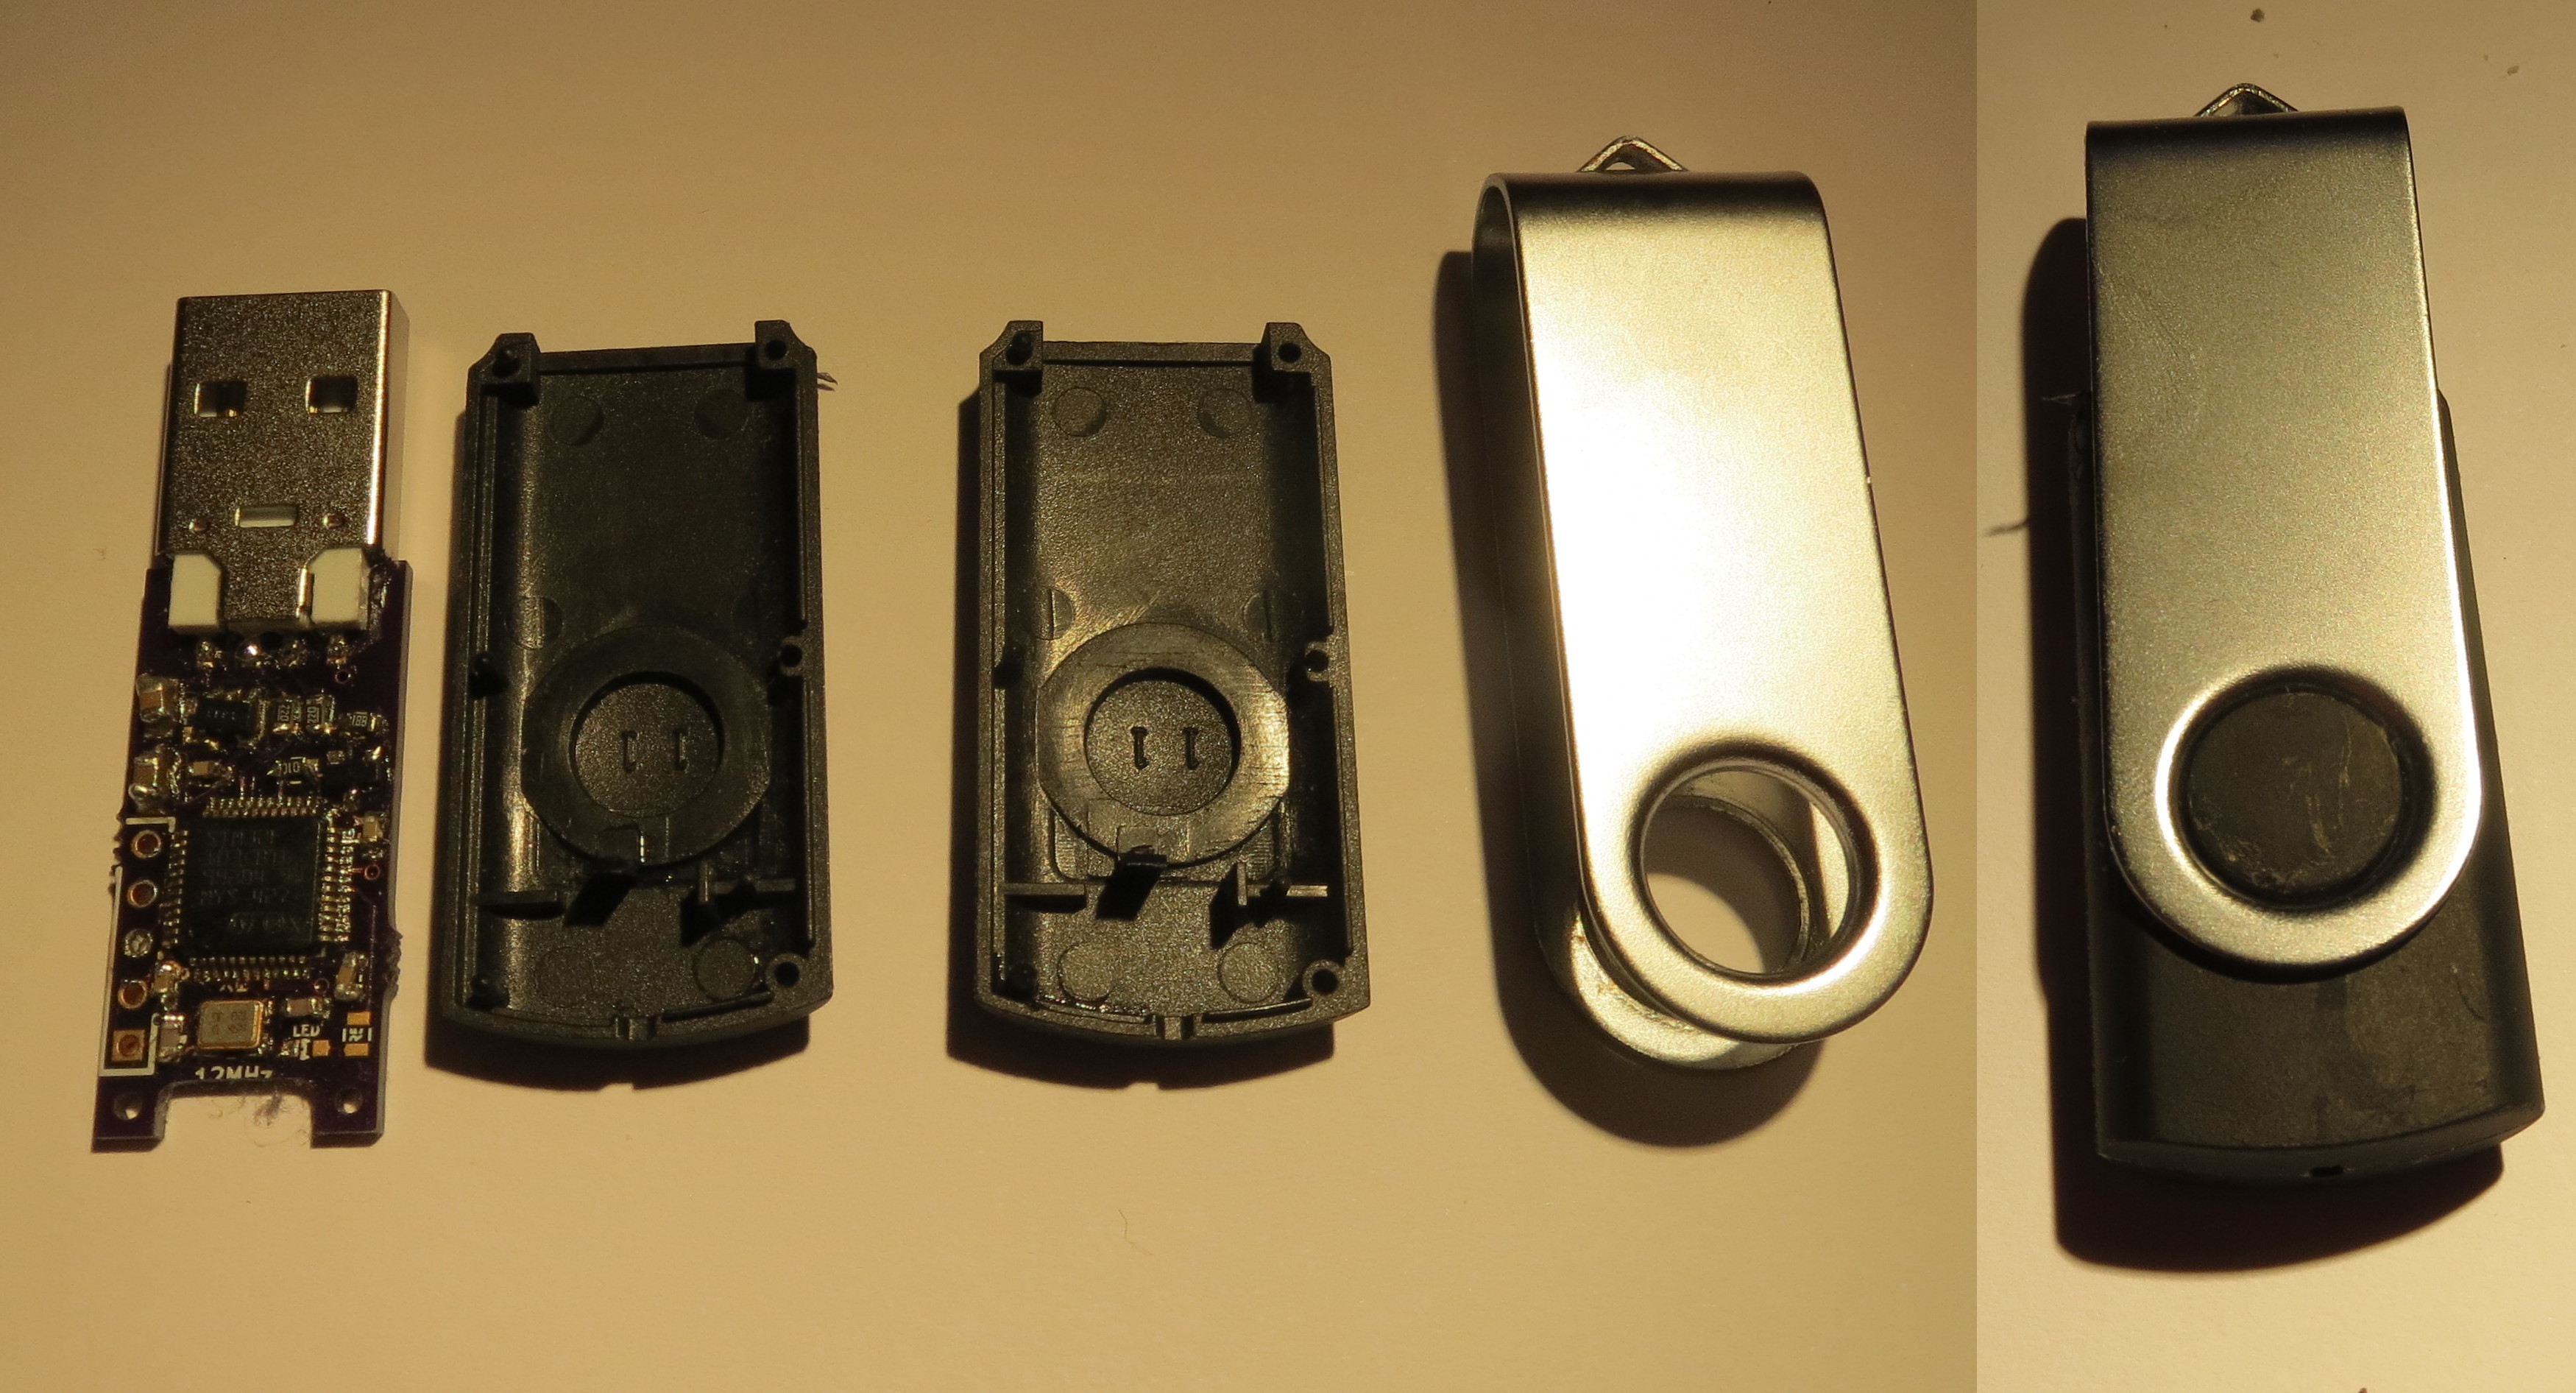
Naturally I’ve released the Kicad files so you can build your own along with the modified Gnuk source and intend to license it formally under a open hardware license once I figure out the details. A few things to bear in mind: it requires moderately difficult surface mount soldering, there’s apparently more than one version of this USB drive casing so I can’t guarantee it’ll fit yours, and for the best fit you’ll want a thinner PCB than OSH Park offer (probably about 1mm or 0.8mm). Also, it uses a slightly exotic USB type-A connector with an unusual footprint. I considered making a dual footprint that also accepted a more common connector but it would require some funny business with holes on the edge of the board because it’s so narrow. Feel free to make the appropriate modifications if necessary. Its advantages over the official FST-01 hardware are that all the parts can be hand-soldered, it’s programmed using a standard USB-to-serial cable rather than SWD, and the casing is available from non-US suppliers.
Very interesting, is there a follow-up post with details of your current setup?
Thanks!
This is really cool. I have a NitroKey Pro but just found out that that OpenPGP card on it has some NDA junk. Would be fun to build one of these. Could you fix the url to your KiCad files and modified Gnuk Source.
Hi! Your git repository seems down, can you re-upload it somewhere else? I’m interested in the Kicad schematics. Thanks a lot! Andrea
Sorry about that – I had to migrate in a hurry due to my previous hosting provider going out of business and didn’t get around to setting up a bunch of stuff afterwards. Should be fixed now.