My Motorola S9 Bluetooth headset had getting a bit long in the tooth and wasn’t lasting very long between charges – time to replace the battery! Too bad that it’s got a non-replaceable battery, but since when has that ever stopped me? (Maybe it should have. Spoiler warning: it was a nightmare.)
Getting a suitable replacement battery is the easiest part. The official battery is an SP0530AD, but a cheap 051235 battery off Aliexpress for $5 or so works fine as a replacement; a 611235 should fit too if you want a little extra capacity. The hard part is actually getting at the battery to replace it. It’s located inside the big lump at the back of the headband, together with the electronics. Carefully peel away the rubber covering the inside back of the headband and the power button to reveal an access cover beneath a layer of clear tape and goop. Don’t try and peel past the outside edges of the two shiny black bands – it won’t come off and you will cause damage if you force it.
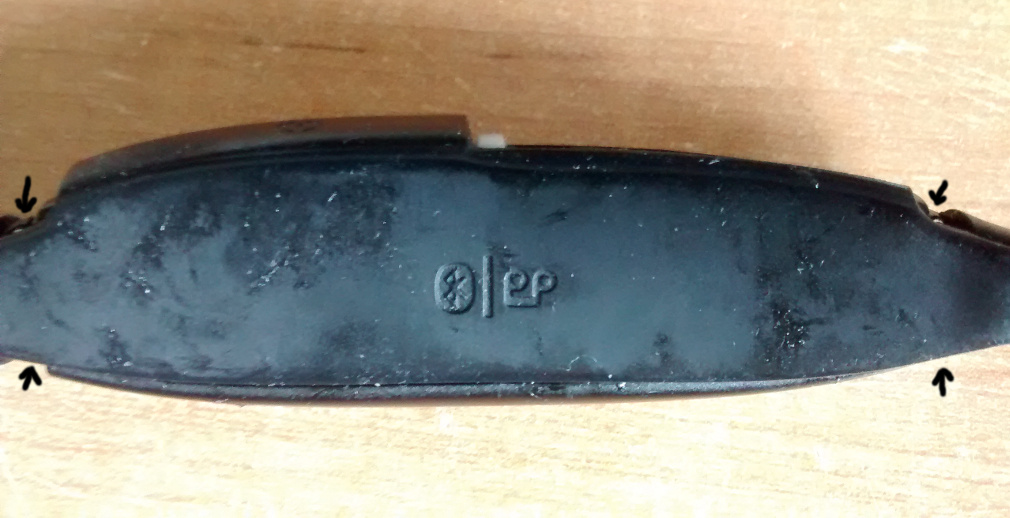
Having done that, you should be able to see that the two shiny black plastic bands are actually clips. Prise them off to reveal 4 tiny screws that hold the battery cover in place, one in each corner – they’re kind of hidden by the goop and tape so you’ll probably have to push it back a little to see and unscrew them.
Now you can very carefully peel up the clear tape covering the power button and prise the cover off along the top and bottom seams to reveal the battery. Be very cautious when doing this – the cover and headband are really fragile once separated and it’s easy to damage them like I did. It doesn’t help that there’s rubber in your way whilst doing this. The flap over the charging socket will fall off, make sure to put it somewhere safe.
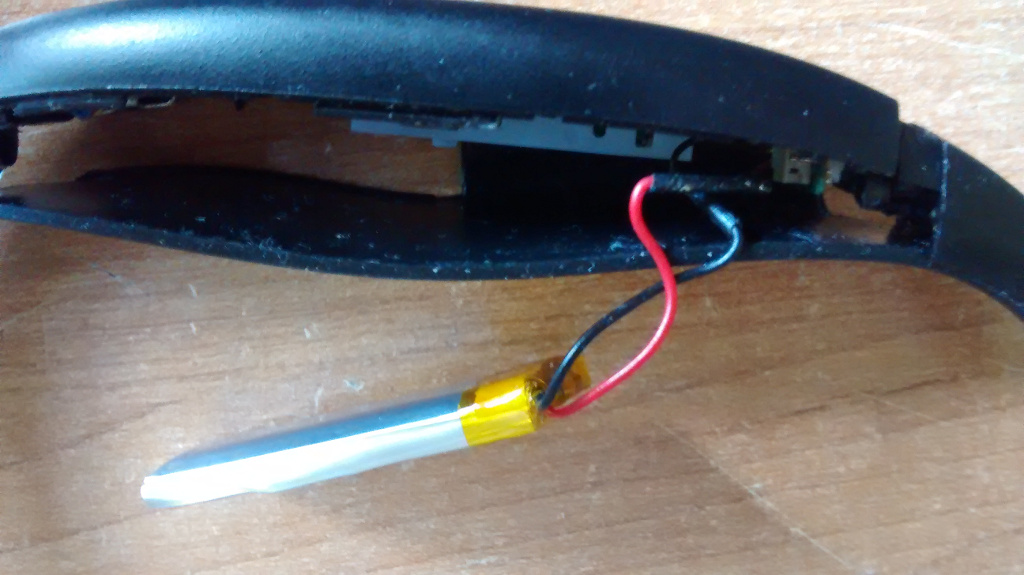
Once you’re inside, you can peel the old battery off the PCB and either unplug it or just cut the wires and solder the new battery’s leads onto them – make sure to protect the joints from shorting with heatshrink if you do that though. Finally, you can stick the new battery in place and carefully put everything back together. Don’t forget to put the flap covering the charging socket back when slotting the battery cover back in place, and double-check it’s still there before you screw the cover on, or you’ll have to repeat the most fiddly part of the whole procedure! (I made this mistake more than once.) Finally, you can stick the rubber back in place.
If you’re lucky you should now have a working Bluetooth headset with a fresh new battery – and hopefully it won’t have to be patched back together with glue and prayers like mine now is.
Thanks for the tutorial! I’ve bought the battery and will be doing the replacement as soon as received.
Popped the back off my H520 bluetooth – easier than I thought – and clipped out the battery. Now have to find a replacement for a SP05132AB. I hate throwing away things that can have a new life but I guess that’s how Motorola makes the big bucks.
Thanks for posting.
Thanks Mako, you saved me!
everything is going well. Is the small circuit board inside the battery wrapping part of the battery or part of the headset? thanks
You mean the little circuit board attached to the battery with yellow tape? That’s a protection board that comes with the battery. I’d strongly recommend against messing with it or trying to remove it because it’s there to stop the battery blowing up if, for example, you accidentally short circuit it.
I snapped the circuit board. Where can I get another?
Thanks for your help,
Murray
Do you have to charge the S9 with the provided charger or can you use the pc?
Thank you for the details! I mourned the loss of these headphones for a long time, but couldn’t bring my self to chuck them. I decided to try a sub $7 3.7V 210mAh 051235 battery off of eBay. I ended up cutting the old battery wires and soldering the new ones and adding heat shrink. My battery had red and black wires while the headset had brown and black. I guessed correctly and connected the red to the brown. I added kapton tape around the battery just to prevent shorting of the electronics what looks to be aluminum on the outside of the battery.
Upon plugging it in to charge, the blue light blinked and then darkness. I figured I broke something in the process. Nope, battery was already charged. Works like a champ!
Did mine tonight! Everything went perfectly. Thanks to your instructions, it works just like new!
In my case, the headphones had been left to sit for a year or two and the battery was completely flat. I opened mine enough to get some clips on the battery tabs, charged it up just a little with an RC charger set to 1S/0.1A to bring the voltage up, then put it back together and it’s charging properly. You can’t always save a battery this way, but sometimes it works.
Oh, and by the way, your HTTPS certificate expired yesterday.